Sign Up
Create your free Kubit account and pick the path that fits — explore example data with zero setup, or integrate your own project in about 15 minutes.
Register
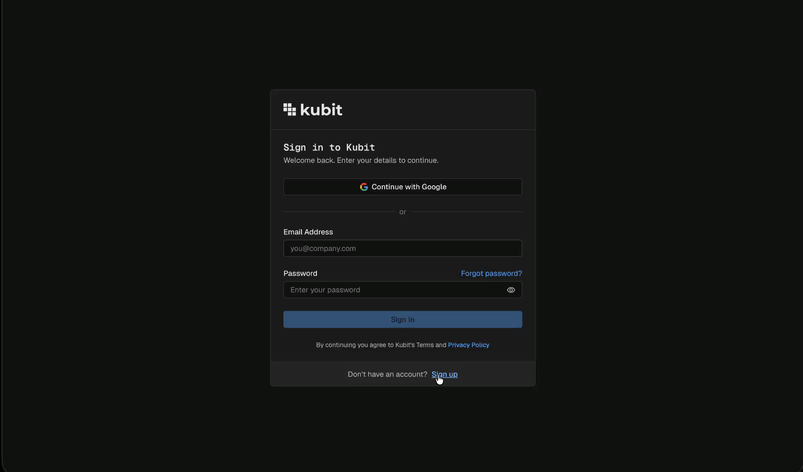
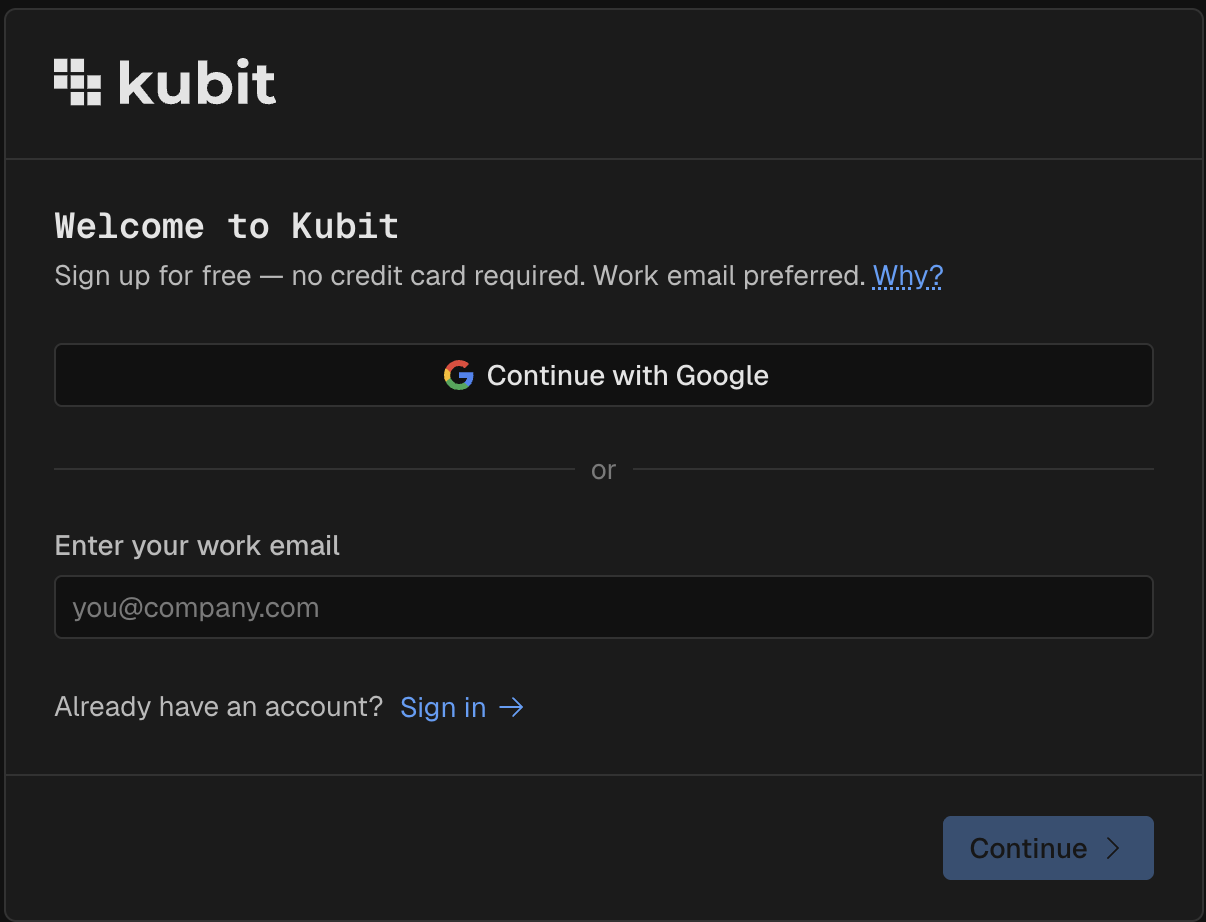
If this is your first time accessing Kubit, you need to create an account. Sign up is free, takes less than a minute, and no credit card is required.
On the login screen, click Sign up at the bottom.
Choose Continue with Google, or enter your email address.
(Recommended) Use your work email — Kubit will auto-enrich your trace data with additional context.
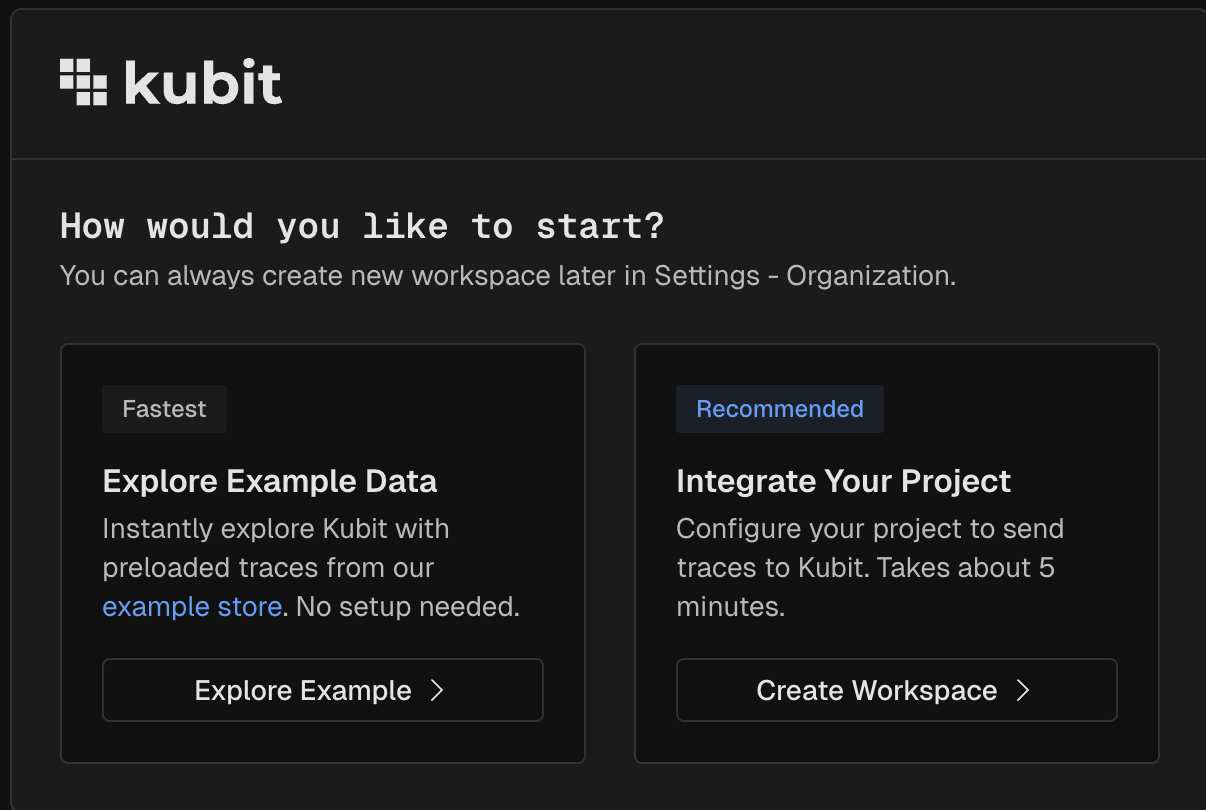
Choose your path
Once you're signed in, pick the path that fits the moment — you can always switch later, so this isn't a one-way door.
Option 1: Explore Example Data — No setup, no integration. You're in Kubit in under a minute, poking around the pre-built Example workspace and its sample agent traces. Best when you just want to see the product in action and integrate your project later.
Option 2: Integrate Your Project — About 5 minutes. Name your workspace, generate context, generate an API key, install the Kubit plugin in Claude Code or Cursor, and run
/kubit-integrateto start sending real traces from your project.
Option 1: Explore Example Data
Pick this path and you land directly in the Example workspace. It ships with a pre-built dashboard powered by trace data from the Demo Store — a fictional online storefront we use to show what Kubit captures from a real agent.
Open the default dashboard from Home.
Skim the reports — agent activity, errors, sessions, user behavior — to get a feel for what's there.
[Screenshot]
Take a deeper tour to explore Demo Store when you're ready.
Option 2: Integrate Your Project
Pick this path when you want to send your own traces into Kubit. Plan on about 15 minutes end-to-end.
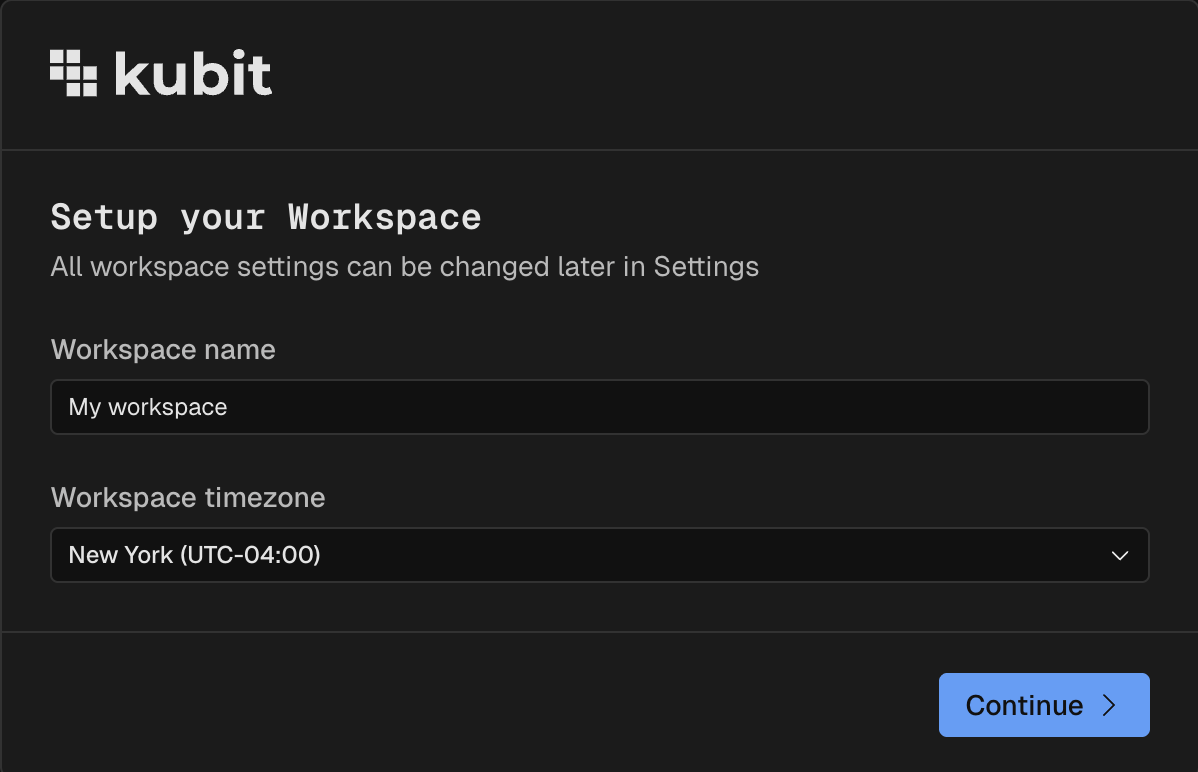
1. Name your workspace
Give the workspace a name and pick a timezone. The timezone controls how dates and times display in reports and dashboards.
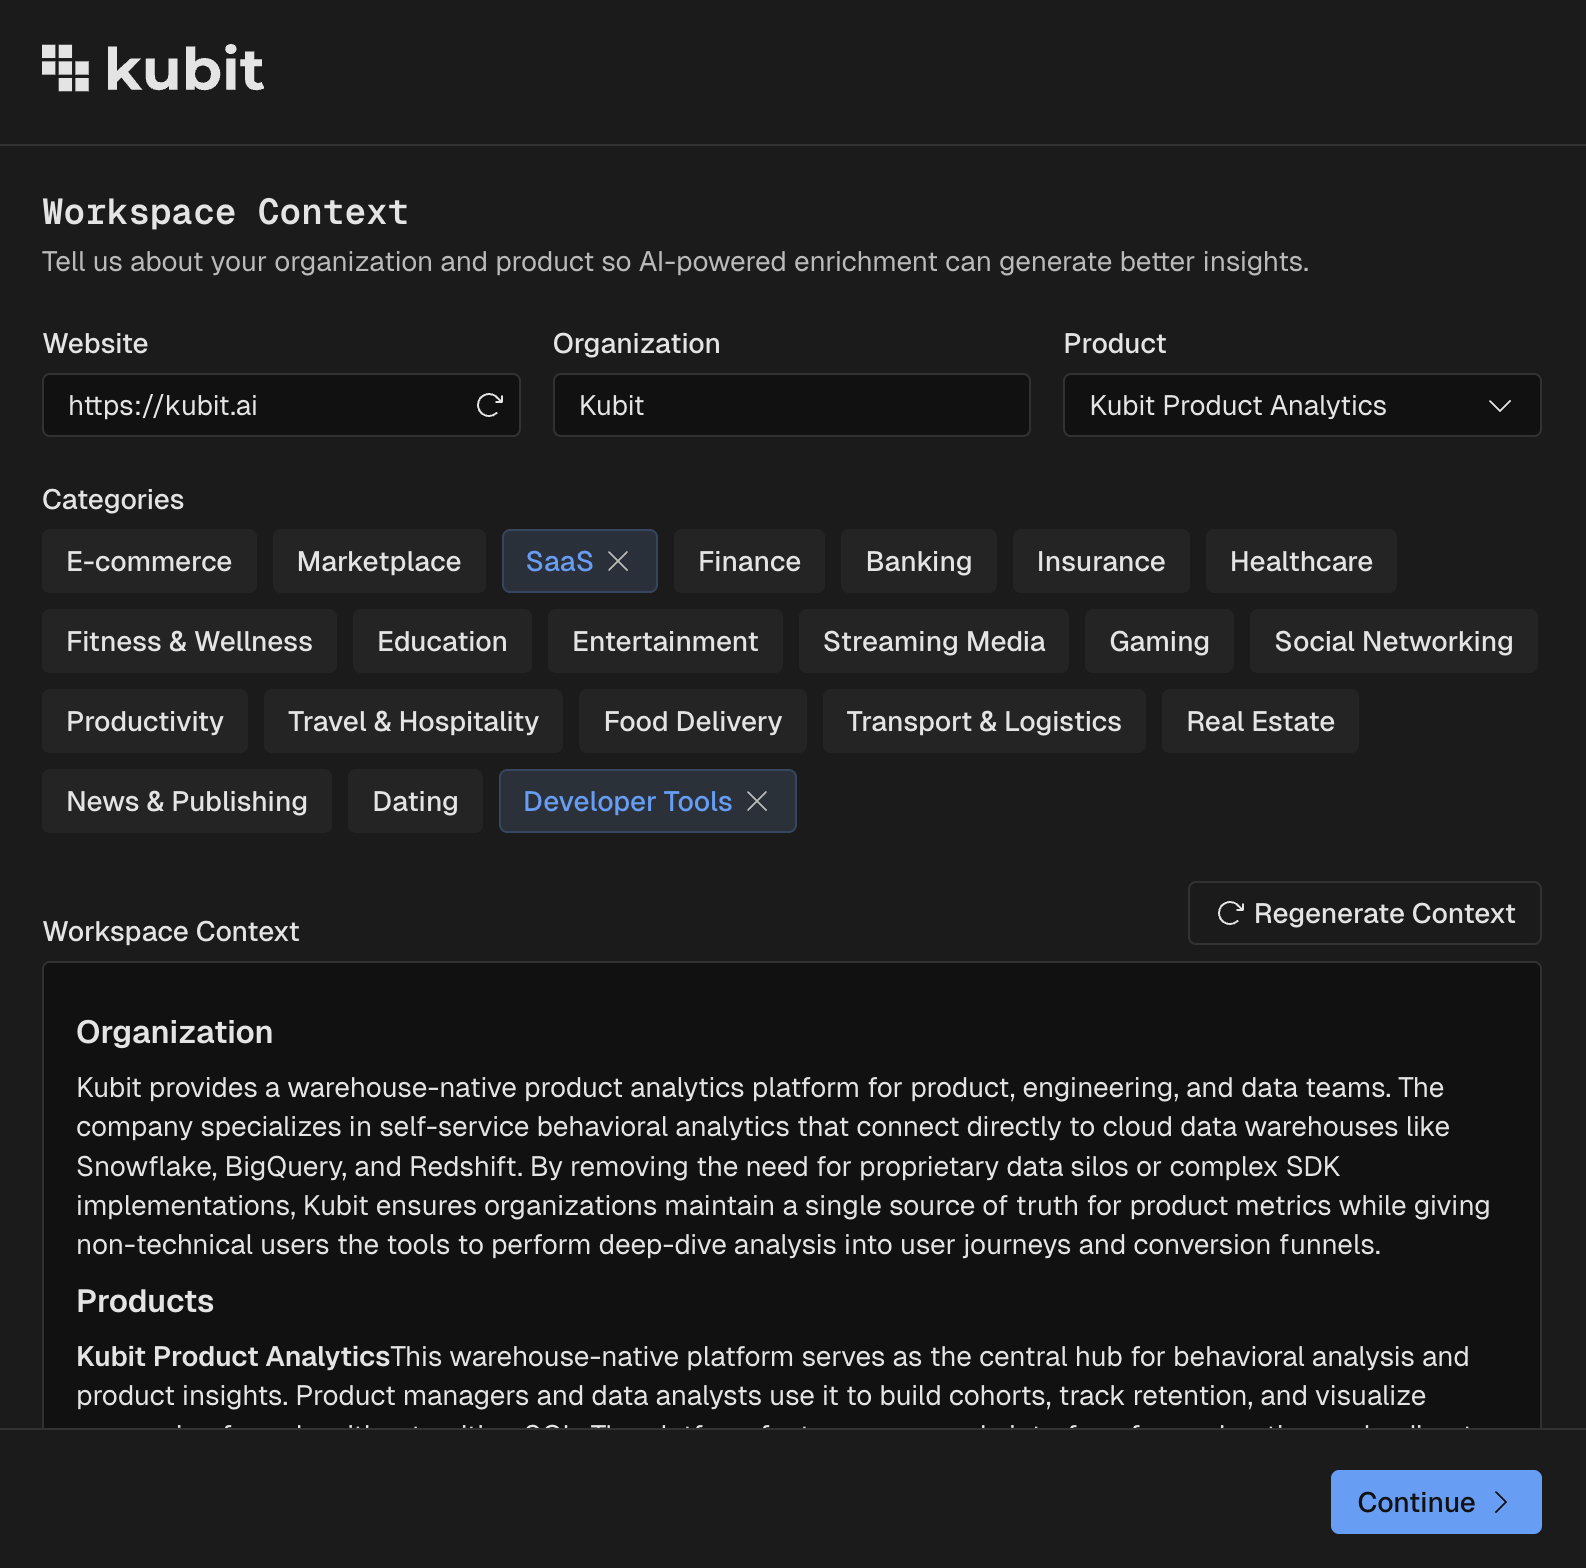
2. Config workspace context
Workspace context — your company, product, and categories — is what Kubit uses to enrich and label the traces it ingests.
If you signed up with a work email, Kubit auto-generates this context for you. Review the fields and edit anything that's off, right inline. You can always update it later under Settings - Workspace - Context.
Otherwise, fill in your website, click Refresh. Then adjust organization name, product, and any relevant categories, then click Regenerate Context.
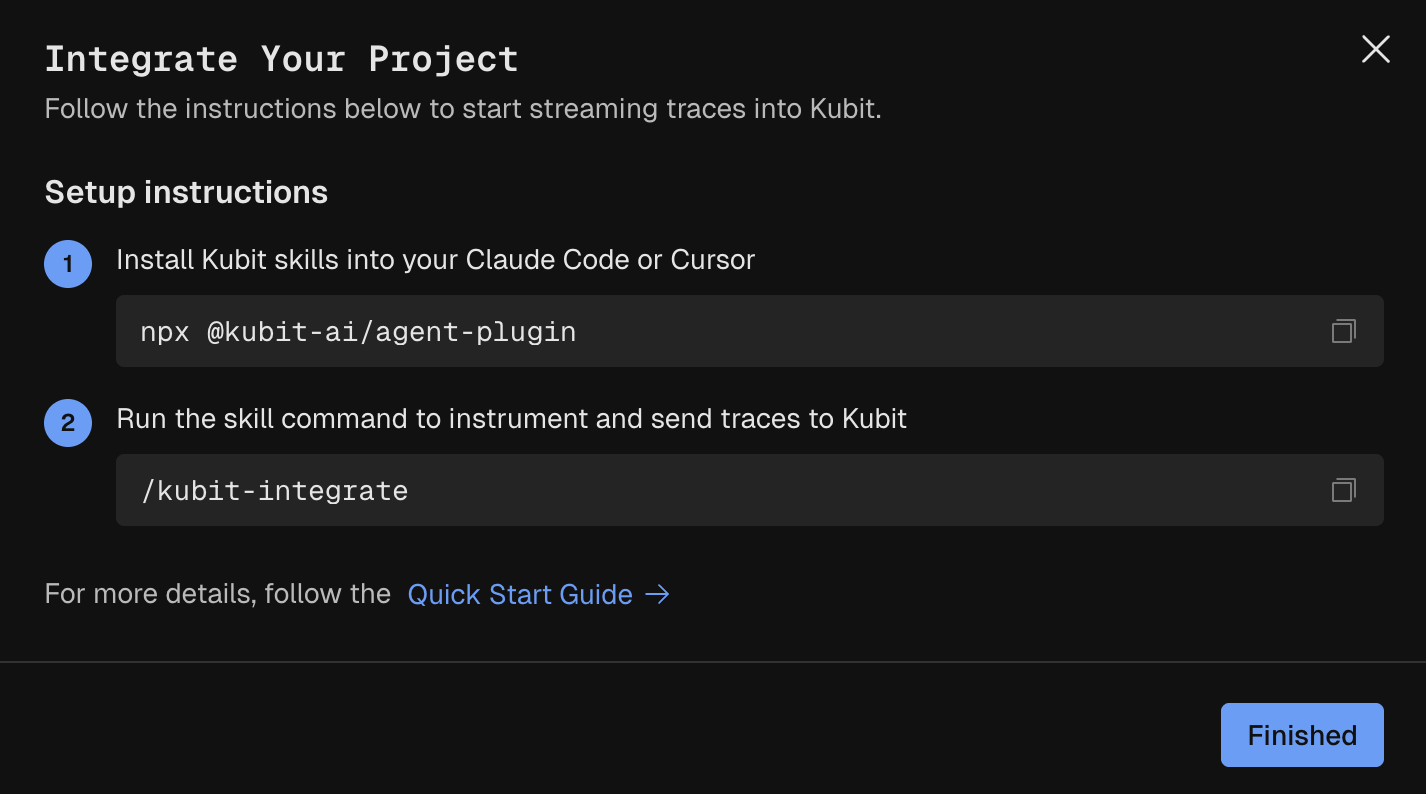
3. Integrate your project
Follow the on-screen setup instructions:
Install the Kubit Plugin for Claude Code or Cursor. This installs Kubit's MCP server and the full skills library, including
/kubit-integrate.npx @kubit-ai/agent-plugin
Run the
/kubit-integrateskill and follow the prompts to detect your AI framework and observability SDK, wires up through OTel, and gets traces flowing into your new workspace in under 5 minutes.Run
/kubit-inspectskill to verify traces
Details
Check Integrate your project for a complete walk-through, or reference Install Kubit Plugin and Use Kubit Skills.
Next steps
Understand Orgs and Workspaces — a quick orientation to Kubit's account structure.